The median filter is a rank filter and is one of the most popular filters for reducing noise in microscopy images.
While the median filter has indeed many good properties, it should be - like any other filter - used with care and a good understanding of its properties.
Prerequisites
Before starting this lesson, you should be familiar with:
After completing this lesson, learners should be able to:
Understand in detail what happens when applying a median filter to an image
Concept map
graph TD
pixel --> NE("neighbourhood pixel values")
NE --> median
median --> MF("median filtered pixel value")
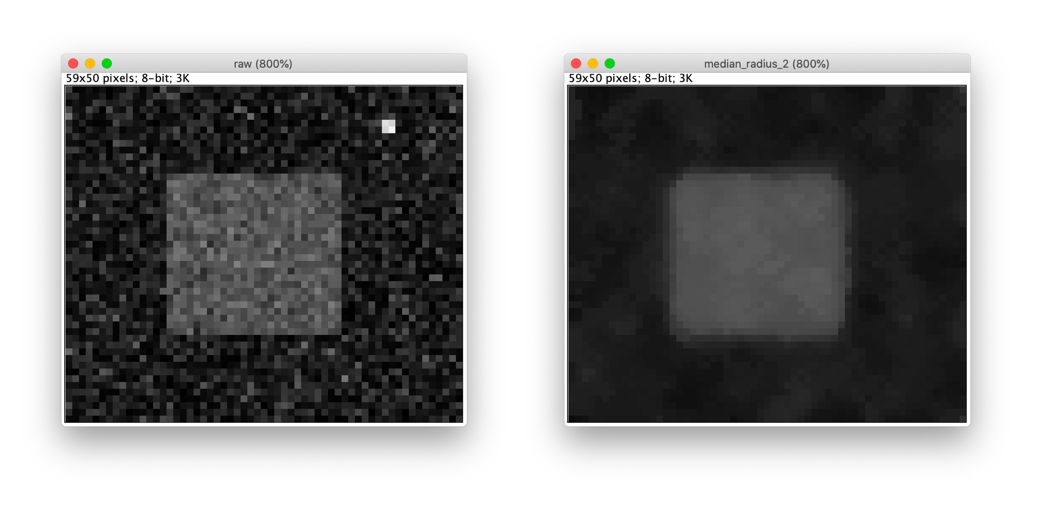
Figure
Median filter example. Left - Raw; Right - After a 5x5 median filter.
Properties of median filter
The median filter is based on ranking the pixels in the neighbourhood
In general, for any neighbourhood filter, if the spatial extend of the neighbourhood is significantly
(maybe three-fold) smaller than the smallest spatial length scale that you care about, you are on the safe side.
However, in biology, microscopy images are often containing relevant information down to the level of a single pixel. Thus, you typically have to deal with the fact that filtering may alter your image in a significant way. To judge whether this may affect your scientific conclusions you therefore should study the effect of filters in some detail.
Although a median filter typically is applied to a noisy gray-scale image, understanding its properties is easier when looking at a binary image.
From inspecting the effect of the median filter on above test image, one could say that a median filter
is edge preserving
cuts off at convex regions
fills in at concave regions
completely removes structures whose shortest axis is smaller than the filter width
Explore the effect of the median filter on various example images. Explore how changing the size (structural element) of the filter affects the result.
Observe how the median filter behaves for binary images.
Show activity for:
ImageJ Macro
run("Close All");//File > Open...open("https://github.com/NEUBIAS/training-resources/raw/master/image_data/xy_8bit__two_noisy_squares_different_size.tif");// Image > Duplicate...run("Duplicate...","title=Median_1");// Image > Duplicate...run("Duplicate...","title=Median_2");// Image > Duplicate...run("Duplicate...","title=Median_5");selectWindow("Median_1");// Process › Filters › Median...run("Median...","radius=1");selectWindow("Median_2");// Process › Filters › Median...run("Median...","radius=2");selectWindow("Median_5");// Process › Filters › Median...run("Median...","radius=5");run("Tile")
skimage napari
# %%
# Median filtering
# %%
# import modules
importnapariimportnumpyasnpfromskimageimportfiltersfromskimage.filtersimportrankfromskimage.morphologyimportdisk# Structuring element
fromOpenIJTIFFimportopen_ij_tiff# %%
# Instantiate the napari viewer
viewer=napari.Viewer()# %%
# Read and view the image
image,*_=open_ij_tiff('https://github.com/NEUBIAS/training-resources/raw/master/image_data/xy_8bit__two_noisy_squares_different_size.tif')viewer.add_image(image)# %%
# Compare small median and mean filter
# - Appreciate that the median filter better preserves the edges
median_1=filters.median(image,disk(1))viewer.add_image(median_1)mean_1=rank.mean(image,disk(1))viewer.add_image(mean_1)# %%
# Compare a larger median and mean filter
# - Appreciate that a median filter eliminates the small square entirely
median_3=filters.median(image,disk(3))viewer.add_image(median_3)mean_3=rank.mean(image,disk(3))viewer.add_image(mean_3)########### New image: nucleare speckles #############
# %%
# Clear the napari viewer
viewer.layers.clear()# %%
# Load image
image,*_=open_ij_tiff('https://github.com/NEUBIAS/training-resources/raw/master/image_data/xy_8bit__PCNA.tif')# %%
# View the image and find the radius of the intra-nuclear speckles
viewer.add_image(image)# %%
# Remove small intra-nuclear structures
# - Appreciate that a median filter removes the intra-nuclear speckles while keeping the nuclear shape intact
# - This can be helpful in many ways, e.g. some deep learning nuclear segmentation tools get confused by intra-nuclear speckles
# - Another application is to subtract the filtered image from the original image to only have the speckles; this will be used in the
# "local background subtraction" training module
image_without_speckles=filters.median(image,disk(radius=15))viewer.add_image(image_without_speckles)# %%
# Close the viewer (CI test requires this)
viewer.close()
Once the upload is finished, click the Close button at the bottom of the upload window
The uploaded images will be available in your Galaxy history on the right panel.
Apply Median Filter
In the Tools panel, search Filter 2D image, and click Filter 2D image with scikit-image from the search results
In Galaxy main window,apply the followings
Filter type: Median
Radius/Sigma: Explore different values, such as 1,2 or 5
Source file: click the second button to activate Multiple datasets. Select images from the dropdown list.
Click Run Tool
Depending on the number of input images, you will see the corresponding number of outputs in the History panel on the right. Wait for them to turn green and download the resulting images.
Assessment
True or false?
Median filter is just another name for mean filter.
Small structures can completely disappear from an image when applying a median filter.
Solution
Median filter is just another name for mean filter. FALSE
Small structures can completely disappear from an image when applying a median filter. TRUE